
Format Codes for your Forum Posts
What are format codes?
Our forums is based on a platform called Discourse. When creating posts on our forums, you are using Discourse to communicate with the community! Discourse has many powerful tools, some of which allow your posts to be more than just text. The way you access these tools is through formatting codes! They are bits of text that may seem like random symbols, but actually program your post to do a whole range of things from displaying images to creating polls!
Why use them?
They make your posts stand out from the crowd, making them look more tidy, professional and appealing to read. By putting in the extra bit of effort, you will feel proud of all your posts!
Table Of Contents
• Headings
• Emphasis
• Colors
• Lists
• Links
• Media
•> Images
•> Videos
• Block Quotes
• Rules
• Tables
• Other Codes
• > BBCode
• > HTML
• > > Forced Line Breaks
• > > Keyboard Button Indicators
• > > Alignment
• Polls
• Spoilers
• Dates
Notes:
- The best way to learn further or more advanced formatting is to play around with it!
- While HTML has more features and options, a lot of them don’t work on the forums. I’d recommend overall to use BBCode as the go-to formatting language.
- If you ever want to view the formatting of a post, you can do so by going to the link:
https://www.munchymc.com/forums/raw/TOPIC_ID/POST_ID. For example, you can view this post’s formatting by going tohttps://www.munchymc.com/forums/raw/44487/1as it is the first post in topic 44487 (found in the URL).
Headings
They can be done by using #:
# Heading 1
## Heading 2
### Heading 3
#### Heading 4
##### Heading 5
###### Heading 6
Heading 1
Heading 2
Heading 3
Heading 4
Heading 5
Heading 6
Large headings can also be achieved by:
Heading A
-
Or:
Heading B
=
Heading A
Heading B
You can also use HTML code to create headings that can be linked to (much like how the table of contents works in this post). This is done like this:
<h1>Title!</h1>
<h6>Small title!</h6>
Title!
Small title!
Click here to go back to the top.
Emphasis
**Bold** or __Bold__
Bold
_Italics_ or *Italics*
Italics
~~strike-through~~
strike-through
`Inline Code`
Inline Code
```
Block Code
(Over many lines)
```
Block Code
(Over many lines)
You can create coloured syntax in block code by naming the desired language after the first three ` as follows:
```javascript
function foo(bar){
return bar+1;
}
```
function foo(bar){
return bar+1;
}
Alternatively, you can use the phrase text to remove all syntax highlighting.
Click here to go back to the top.
Colors
Colors are a great way to add flavor and spice to your posts! Luckily it is very easy to do;
[color=YOUR_COLOR_HERE]Your text here![/color]
You can either use one of the predefined colors, or a hex value. Using a hex value (such as #21cf15 for green) allows for far more customisation, and can be done using a color picker tool. The set of predefined colors are easier to remember though.
Here is the full list of predefined colors:
| Color name | Hex value |
|---|---|
| Alicewhite | F0F8FF |
| Antiquewhite | FAEBD7 |
| Aqua | 00FFFF |
| Aquamarine | 7FFFD4 |
| Azure | F0FFFF |
| Beige | F5F5DC |
| Bisque | FFE4C4 |
| Blanchedalmond | FFEBCD |
| Blue | 0000FF |
| Blueviolet | 8A2BE2 |
| Brown | A52A2A |
| Burlywood | DEB887 |
| Cadetblue | 5F9EA0 |
| Chartreuse | 7FFF00 |
| Chocolate | D2691E |
| Coral | FF7F50 |
| Cornflowerblue | 6495ED |
| Cornsilk | FFF8DC |
| Crimson | DC143C |
| Cyan | 00FFFF |
| Darkblue | 00008B |
| Darkcyan | 008B8B |
| Darkgoldenrod | B8860B |
| Darkgray | A9A9A9 |
| Darkgreen | 006400 |
| Darkkhaki | BDB76B |
| Darkmagenta | 8B008B |
| Darkolivegreen | 556B2F |
| Darkorange | FF8C00 |
| Darkorchid | 9932CC |
| Darkred | 8B0000 |
| Darksalmon | E9967A |
| Darkseagreen | 8FBC8F |
| Darkslateblue | 483D8B |
| Darkslategray | 2F4F4F |
| Darkturquoise | 00CED1 |
| Darkviolet | 9400D3 |
| Deeppink | FF1493 |
| Deepskyblue | 00BFFF |
| Dimgray | 696969 |
| Dodgerblue | 1E90FF |
| Firebrick | B22222 |
| Floralwhite | FFFAF0 |
| Forestgreen | 228B22 |
| Fuchsia | FF00FF |
| Gainsboro | DCDCDC |
| Ghostwhite | F8F8FF |
| Gold | FFD700 |
| Goldenrod | DAA520 |
| Gray | 808080 |
| Green | 008000 |
| Greenyellow | ADFF2F |
| Honeydew | F0FFF0 |
| Hotpink | FF69B4 |
| Indianred | CD5C5C |
| Indigo | 4B0082 |
| Ivory | FFFFF0 |
| Khaki | F0E68C |
| Lavender | E6E6FA |
| Lavenderblush | FFF0F5 |
| Lawngreen | 7CFC00 |
| Lemonchiffon | FFFACD |
| Lightblue | ADD8E6 |
| Lightcoral | F08080 |
| Lightcyan | E0FFFF |
| Lightgoldenrodyellow | FAFAD2 |
| Lightgreen | 90EE90 |
| Lightgrey | D3D3D3 |
| Lightpink | FFB6C1 |
| Lightsalmon | FFA07A |
| Lightseagreen | 20B2AA |
| Lightskyblue | 87CEFA |
| Lightslategray | 778899 |
| Lightsteelblue | B0C4DE |
| Linen | FAF0E6 |
| Magenta | FF00FF |
| Maroon | 800000 |
| Mediumaquamarine | 66CDAA |
| Mediumblue | 0000CD |
| Mediumorchid | BA55D3 |
| Mediumpurple | 9370D8 |
| Mediumseagreen | 3CB371 |
| Mediumslateblue | 7B68EE |
| Mediumspringgreen | 00FA9A |
| Mediumturquoise | 48D1CC |
| Mediumvioletred | C71585 |
| Midnightblue | 191970 |
| Mintcream | F5FFFA |
| Mistyrose | FFE4E1 |
| Moccasin | FFE4B5 |
| Navajowhite | FFDEAD |
| Navy | 000080 |
| Oldlace | FDF5E6 |
| Olive | 808000 |
| Olivedrab | 688E23 |
| Orange | FFA500 |
| Orangered | FF4500 |
| Orchid | DA70D6 |
| Palegoldenrod | EEE8AA |
| Palegreen | 98FB98 |
| Paleturquoise | AFEEEE |
| Palevioletred | D87093 |
| Papayawhip | FFEFD5 |
| Peachpuff | FFDAB9 |
| Peru | CD853F |
| Pink | FFC0CB |
| Plum | DDA0DD |
| Powderblue | B0E0E6 |
| Purple | 800080 |
| Red | FF0000 |
| Rosybrown | BC8F8F |
| Royalblue | 4169E1 |
| Saddlebrown | 8B4513 |
| Salmon | FA8072 |
| Sandybrown | F4A460 |
| Seagreen | 2E8B57 |
| Seashell | FFF5EE |
| Sienna | A0522D |
| Silver | C0C0C0 |
| Skyblue | 87CEEB |
| Slateblue | 6A5ACD |
| Slategray | 708090 |
| Snow | FFFAFA |
| Springgreen | 00FF7F |
| Steelblue | 4682B4 |
| Tan | D2B48C |
| Teal | 008080 |
| Thistle | D8BFD8 |
| Tomato | FF6347 |
| Turquoise | 40E0D0 |
| Violet | EE82EE |
| Wheat | F5DEB3 |
| White | FFFFFF |
| Whitesmoke | F5F5F5 |
| Yellow | FFFF00 |
| Yellowgreen | 9ACD32 |
Click here to go back to the top.
Lists
- First bullet point
- First bullet point
- Second bullet point
1. First numbered point
- First numbered point
- Second numbered point
You can also use HTML code to achieve the same outcome:
<ul>
<li>First bullet point</li>
<li>Second bullet point</li>
</ul>
- First bullet point
- Second bullet point
<ol>
<li>First numbered point</li>
<li>Second numbered point</li>
</ol>
- First numbered point
- Second numbered point
Click here to go back to the top.
Links are a great way to add extra information, backup a claim, or provide media to other users!
[This is the link](https://www.munchymc.com/forums/t/an-entire-guide-to-munchymc)
Or:
[url=https://www.munchymc.com/forums/t/an-entire-guide-to-munchymc]This is the link[/url]
This is the link
You can make your writing blue by using the same syntax but including no link ( [blue writing here]() ).
If you have multiple links that are identical in the same post, you can create a key by doing the following:
[Text here][key1]

[key1]: www.google.com
It is important that there is a blank line above where the key is defined in order for it to work. Where the key is defined in the post (geographically) does not matter.
You can also link to other parts of a post, through the use of heading IDs. To do this, first set up your headings:
Title A
Title B
Title C
With each heading having a unique ID:
<h2 id="heading--title-a"> Title A </h2>
<h2 id="heading--title-b"> Title B </h2>
<h2 id="heading--title-c"> Title C </h2>
It is necessary for the ID to begin with heading-- to signify it as a heading.
Then to link to each heading you make a normal link but use the following syntax:
[Some link](#heading--ID)
For example:
Title A
Title B
Title C
[Title A](#heading--title-a)
[Title B](#heading--title-b)
[Title C](#heading--title-c)
Click here to go back to the top.
Media
Images
A picture is a thousand words, they say. A great metaphor, and a very true one! Add pictures now to really take your posts to the next level!The easiest way to add an image to a post is to copy and paste the image straight in and let the editor automatically fill in the syntax. You can also do it manually though like this:

For example:

It’s important to add
.png or .jpg at the end of the link if it is not already there..gif also works.
Hover text
You can add hover text (text that appears by the mouse if it is hovering over the picture) by:


Image resizing
Changing the dimensions of an image is fairly simple - you can either set an image as a percentage of its default size or change its dimensions with pixel measurements:
[logo]:upload://dnrhSFAoSqtsJ6JydqF693JHRMq.png

![Original|300x300][logo]
![Percent|300x300, 75%][logo]
![By Pixels|100x100][logo]
![Distorted|100x300, 50%][logo]
Original:

Resized to 75%:
Resized by pixels:
Distorted by resizing pixels at 50% size:
Another way to add images is to use BBCode, for example:
[img]upload://oPy2zoYIPfu6hADI2TCr6fOzQ5u.jpeg[/img]
You can also add a hyperlink to an image by wrapping it in the [url] tag
[url=https://joshworth.com/dev/pixelspace/pixelspace_solarsystem.html][/url]

^ Click that gif!
Videos
Just like pictures, but 30 of them each second. Wonderful!Just put the link onto a separate line, and the forums will automatically create a play box for it using an ounce of fairy dust.

Click here to go back to the top.
Block Quotes
> Quote 1
>> Quote 2
Quote 1
Quote 2
This can also be done with:
[quote]Quote 1[/quote]
You can add names to a quote with:
[quote=ThunderPickles]Your eyebrows _are_ lit.[/quote]
And you can link a topic post with:
[quote="leCyber, post:12, topic:3980"]Antfrog has evolved ![/quote]
For reference this is the url: https://www.munchymc.com/forums/t/congrats-to-antfrost-our-newest-admin/3980/12
The post is the number on the end (12) and the topic is the unique code before it (in this case 3980)
Click here to go back to the top.
Rules
___ or --- or ***
Be carefull when using *** as if you put it directly under some text it will make that text into a heading. To fix leave a blank line between the text and where you want the rule. This only happens with the *.
You can also create rules using the <hr> HTML tag by putting it on a line by itself.
Click here to go back to the top.
Tables
| User | Favourite food | Rating /10 |
| ---- | -------------- | ---------- |
This is the bare minimum you need for a table and will produce:
| User | Favourite food | Rating /10 |
|---|
From there you can then populate the table:
| User | Favourite food | Rating /10 |
| - | - | - |
| BFI01 | Donuts | 10 |
| Ibby | Pizza | 8 |
| Cheater | Helper souls | 3 |
| BBH | Muffins | 10 |
| Mikeal | Fries | 9 |
| User | Favourite food | Rating /10 |
|---|---|---|
| BFI01 | Donuts | 10 |
| Ibby | Pizza | 8 |
| Cheater | Helper souls | 3 |
| BBH | Muffins | 10 |
| Mikeal | Fries | 9 |
As you can see the table will be automatically built and cleaned up regardless of how long each cell is individually as you write it.
You can also perform alignment of either left, right, or centred by placing colons : on the second row:
| User | Favourite food | Rating /10 |
| :- | :-: | -: |
| BFI01 | Donuts | 10 |
| Ibby | Pizza | 8 |
| Cheater | Helper souls | 3 |
| BBH | Muffins | 10 |
| Mikeal | Fries | 9 |
| User | Favourite food | Rating /10 |
|---|---|---|
| BFI01 | Donuts | 10 |
| Ibby | Pizza | 8 |
| Cheater | Helper souls | 3 |
| BBH | Muffins | 10 |
| Mikeal | Fries | 9 |
| As you can see the table is now left aligned in the first column, centred in the second and right aligned in the third. |
Pro tip - The easiest way to put a table into Discourse is either by using an online generator, or by first creating the table in a spreadsheet software such as Microsoft Excel or Google Sheets, and then copying the entire table from there and pasting it straight into the post.
You can also use HTML tags to create tables with the <table> tag.
Click here to go back to the top.
Other Codes
BBCode
This uses the HTML concept of <></>, but using [][/].
For example:
[b]Bold[/b]
Bold
[i]Italics[/i]
Italics
[u]Underlined[/u]
Underlined
[s]Strikethrough[/s]
Strikethrough
For a more in depth tutorial on BBCode, please see this 3rd party guide.
HTML
This is arguably the most advanced way to format your posts - it allows for lots of customization.
For example:
<b>Bold</b>
Bold
<i>Italics</i>
Italics
Forced Line Breaks
A neat HTML to use is <br>. What this will do is force a line break (blank line) and can help with formatting when a stubborn piece of text will cling on to the heading above, among other examples. Place the <br> on a line by itself to make it into a blank line.
Keyboard Button Indicators
You can easily show keyboard shortcuts or buttons by using the tag <kbd>BUTTON</kbd>. This will create the following effect:
CTRL+C
ENTER
CTRL+V
Which is done like this:
<kbd>CTRL</kbd>+<kbd>C</kbd>
<kbd>ENTER</kbd>
<kbd>CTRL</kbd>+<kbd>V</kbd>
<kbd>Technically, any amount of text can be placed inside one of these boxes!</kbd>
Technically, any amount of text can be placed inside one of these boxes!
Alignment
You can align content in your post by making use of the <div> tag. There are three options - left (which is the default), centred, or right aligned.
<div align="center">
Some text/image/video/anything here!
</div>
Woohoo!
To find out more about HTML codes, visit this third party website. Not all codes will work on Discourse, though.
Click here to go back to the top.
Polls
The easiest way to build a poll is to use the cog icon ![]() in the tool bar and then click the Build Poll button:
in the tool bar and then click the Build Poll button:
![]()
This will bring up the following prompt:

That can be filled out to create a poll. Alternatively, you can use BBCode to create a poll as follows:
[poll]
- Yes
- No
[/poll]
- Yes
- No
Some extra things (attributes) you can add to your polls include:
-
type=(can be “multiple” or “number” for a multiple choice or a number scale to rate something (it finds the average)) -
min=andmax=(picks the minimum and maximum amount of options a user has to choose) -
name=(if you have multiple polls in one post this is necessary. Can be called anything but cannot contain spaces)
For example:
[poll type=number min=1 max=10][/poll]
- 1
- 2
- 3
- 4
- 5
- 6
- 7
- 8
- 9
- 10
And:
[poll type=multiple min=2 max=3 name=poll_3]
- .exe
- .html
- .msi
- .js
- .py
[/poll]
- .exe
- .html
- .msi
- .js
- .py
(I guess you could say it’s a multi-poll)
Last note, polls have a maximum of 50 options and a 10 minute window for you to make changes to the poll after posting it.
Click here to go back to the top.
Spoilers
If you wish to hide some information until it is clicked on and manually made visual, spoilers are the way to go:
[details=Title] Spoilt text :( [/details]
Title
Spoilt text :(
Anything can be put in a spoiler section, from text to images to whole sections or paragraphs of your post!
Click here to go back to the top.
Dates
Adding dates can be a useful way to represent times of an event or some other occasion. The easiest way to add a date is to click the calendar icon ![]() in the tool bar to bring up the prompt:
in the tool bar to bring up the prompt:
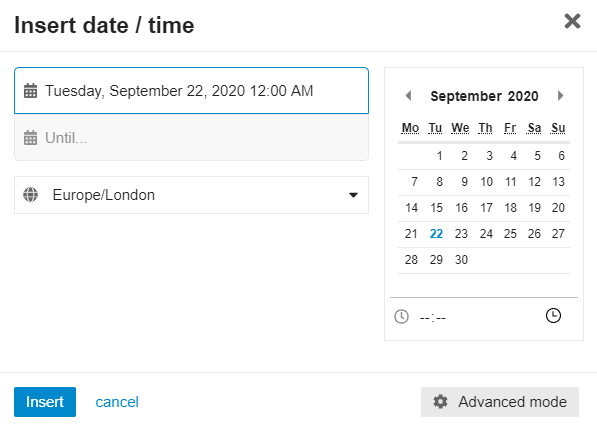
Which can then be used to place dates into your post. Alternatively you can use BBCode, which would look as follows:
[date=2020-09-22]2020-09-22T00:00:00Z
You can add a time:
[date=1996-04-22 time=22:00:00 timezone="US/Central"]
1996-04-23T03:00:00Z
A time zone can also be specified, and for each user the time will be automatically adjusted to their own time zone, making dates and times very streamlined.
Furthermore, you can also have a recurring date and time:
[date=2020-09-22 time=06:30:00 timezone="Europe/London" recurring="1.weeks"]
2020-09-22T05:30:00Z
Change the formatting of the time:
[date=2020-09-20 time=14:00:00 format="Do MMM YYYY hh:mm:ssa Z" timezone="Europe/London"]
20th Sep 2020 01:00:00pm +00:00
Some key formatting terms are as follows:
| Input | Example | Description |
|---|---|---|
| YYYY | 2014 | 4 or 2 digit year |
| YY | 14 | 2 digit year |
| Q | 1..4 | Quarter of year. Sets month to first month in quarter |
| M MM | 1..12 | Month number |
| MMM MMMM | Jan..December | Month name |
| D DD | 1..31 | Day of month |
| Do | 1st..31st | Day of month with ordinal |
| DDD DDDD | 1..365 | Day of year |
| ddd dddd | Mon…Sunday | Day name |
| L | 09/04/1986 | Date (in local format) |
| LL | September 4 1986 | Month name, day of month, year |
| LLL | September 4 1986 8:30 PM | Month name, day of month, year, time |
| LLLL | Thursday, September 4 1986 8:30 PM | Day of week, month name, day of month, year, time |
| LT | 8:30 PM | Time (without seconds) |
| LTS | 8:30:00 PM | Time (with seconds) |
| H HH | 0..23 | Hours (24 hour time) |
| h hh | 1..12 | Hours (12 hour time used with a A) |
| k kk | 1..24 | Hours (24 hour time from 1 to 24) |
| a A | am pm | Post or ante meridiem (Note the one character a p are also considered valid) |
| m mm | 0..59 | Minutes |
| s ss | 0..59 | Seconds |
| N | AD | Abbr Era name |